Galleries allow you to store, organize, share and sell your images from a single online repository.

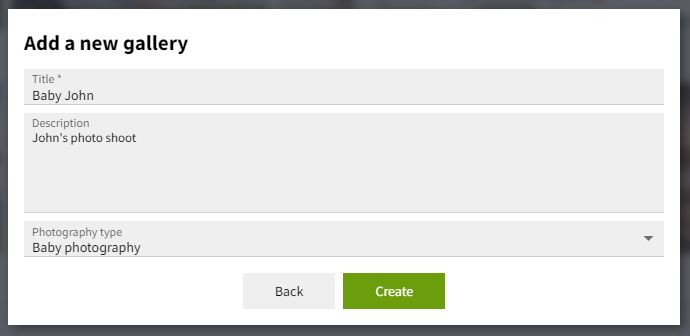
To create a gallery, you need to go to the Galleries and click on the Add button. A pop-up menu will appear letting you write a title, a description and choosing the Photography Type. Once filled, you need to click on Create.
A new gallery will appear on your Galleries.

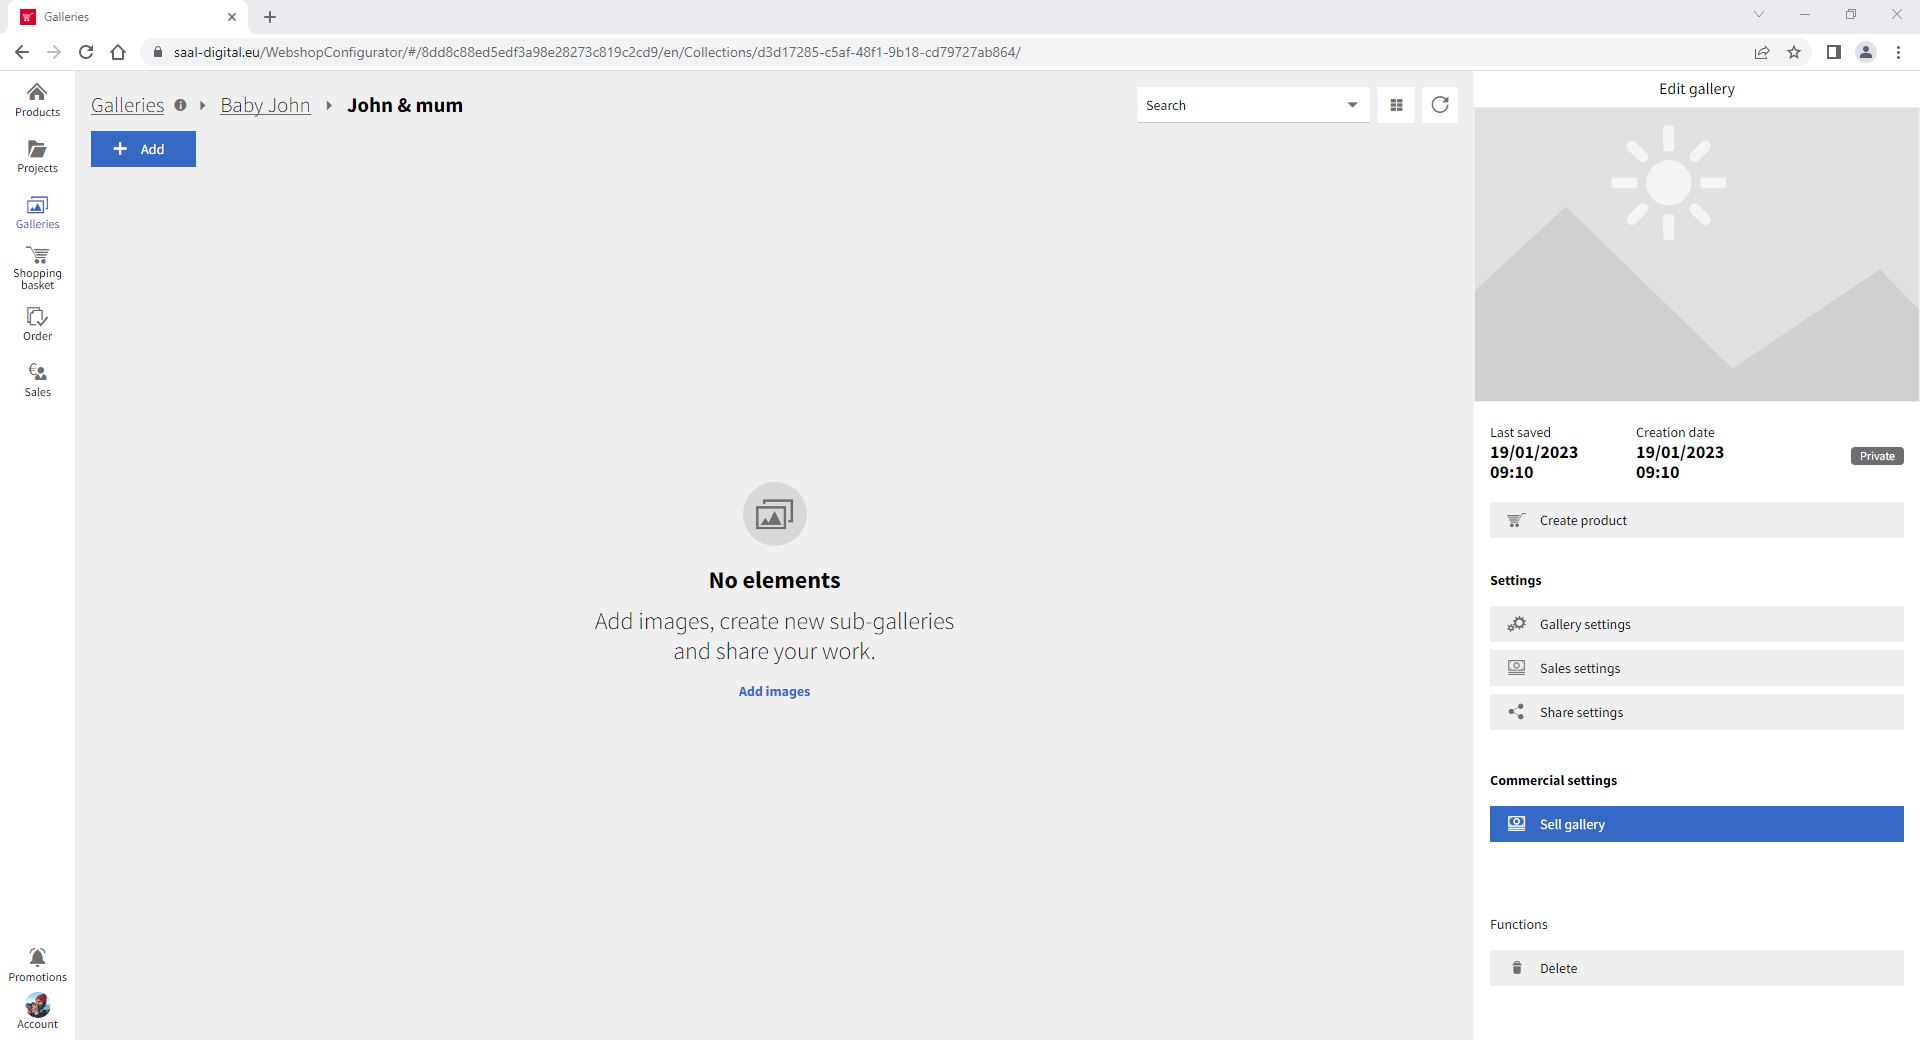
You can open your new gallery by clicking on it. You will see that the new gallery is empty.

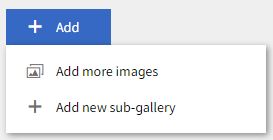
To add images, you have to click on Add, Add images, and select the place where your photos are stored. Or you can add the photos directly by dragging them from a folder and dropping them in the gallery.

The right column of the gallery displays important information such as the status of the gallery, the date it was created, the date it was last saved, and the total file size of the entire gallery. It also contains the Main image of the gallery, the Settings and Functions buttons, the option to Create a Product with the images in your gallery and the Main image. The options and information in this column are updated with each change, giving you complete overview and control over the contents of your gallery.

In addition to galleries, you have the option to create sub-galleries within the gallery. Very useful for organizing your photos or making selections of photos to send to specific groups of people. To create sub-galleries, you need to click on Add and select Add new sub-gallery
A pop-up menu will appear letting you write a title, a description and choosing the Photography type. Here you can also activate or deactivate the option to automatically share the sub-gallery when the main gallery is shared. Once filled, you need to click on Create.

A new sub-gallery will appear inside the gallery. You can open your new sub-gallery by clicking on it. You will see that this new sub-gallery is empty. You can add photos by clicking on the Add button as per on galleries.
And you can select photos from the main gallery to place them in the sub-gallery. You just need to return to the main gallery by clicking on it.

And select the photos you want to move to the sub-gallery. To select more than one photo you need to click on Select multiple checkbox, and then select the photos. Once an image is selected, on the right menu will appear the option to copy, move to and delete. To add the selected photos to the sub-gallery, choose to copy or move, depending on your needs.
After uploading images to a gallery, you can arrange them in the order you prefer. Simply drag and drop a photo into the desired position. The customer will see the order in which you have arranged the photos in the shared gallery.
Galleries and sub-galleries can also be organized in the same way. From the Galleries menu, grab a gallery and drag it to the desired position. If you have a Profile Page and choose to share galleries with the Publish on Profile Page option enabled, the order you set here will determine how they’re displayed on your profile.
You can also use the Sort button in the top right-hand corner. If you click on it, you'll be presented with various sorting options for your galleries and images:
Creation date: This option sorts images by their creation date.
Name: Sorts the images alphabetically by name.
Manual order: Each image is assigned an increasing index number as it is uploaded, with new images receiving the next highest number. If you drag and drop images manually, this index number will be adjusted accordingly.
You can also specify whether the sort order is ascending or descending.
Galleries display an informative label allowing you to check their status at a glance.
In Validation: This indicates that the photos uploaded to the gallery are currently being reviewed. The status of the gallery will automatically change once the photos have been reviewed and approved.
Private: This means that the gallery and the photos it contains are visible only to you, the gallery owner, and are not accessible to others.
Shared: This means that it is accessible to others based on the configuration you have set in its Share Settings. A shared link is available to allow people to access and view the gallery. Photos are not set for sale.
Commercial: This indicates that the allow ordering option is enabled. This means that photos in the gallery can be purchased according to the price list and configuration you have set in its Sales Settings.
Deactivated: This indicates that the gallery is no longer shared and therefore no longer commercial (even if it was). The gallery is effectively hidden from public view.

It is possible to recover a deleted gallery if less than 30 days have passed since it was deleted. Within the gallery menu, click the filter button in the top right corner. Select the Show deleted filter to list deleted galleries. Click on the three dots button of a deleted gallery and select the Restore elements option to restore it to the main gallery menu.


Get exclusive discounts and designing tips! By signing up, you acknowledge our Privacy Policy. You can unsubscribe at any moment.