Wall Art
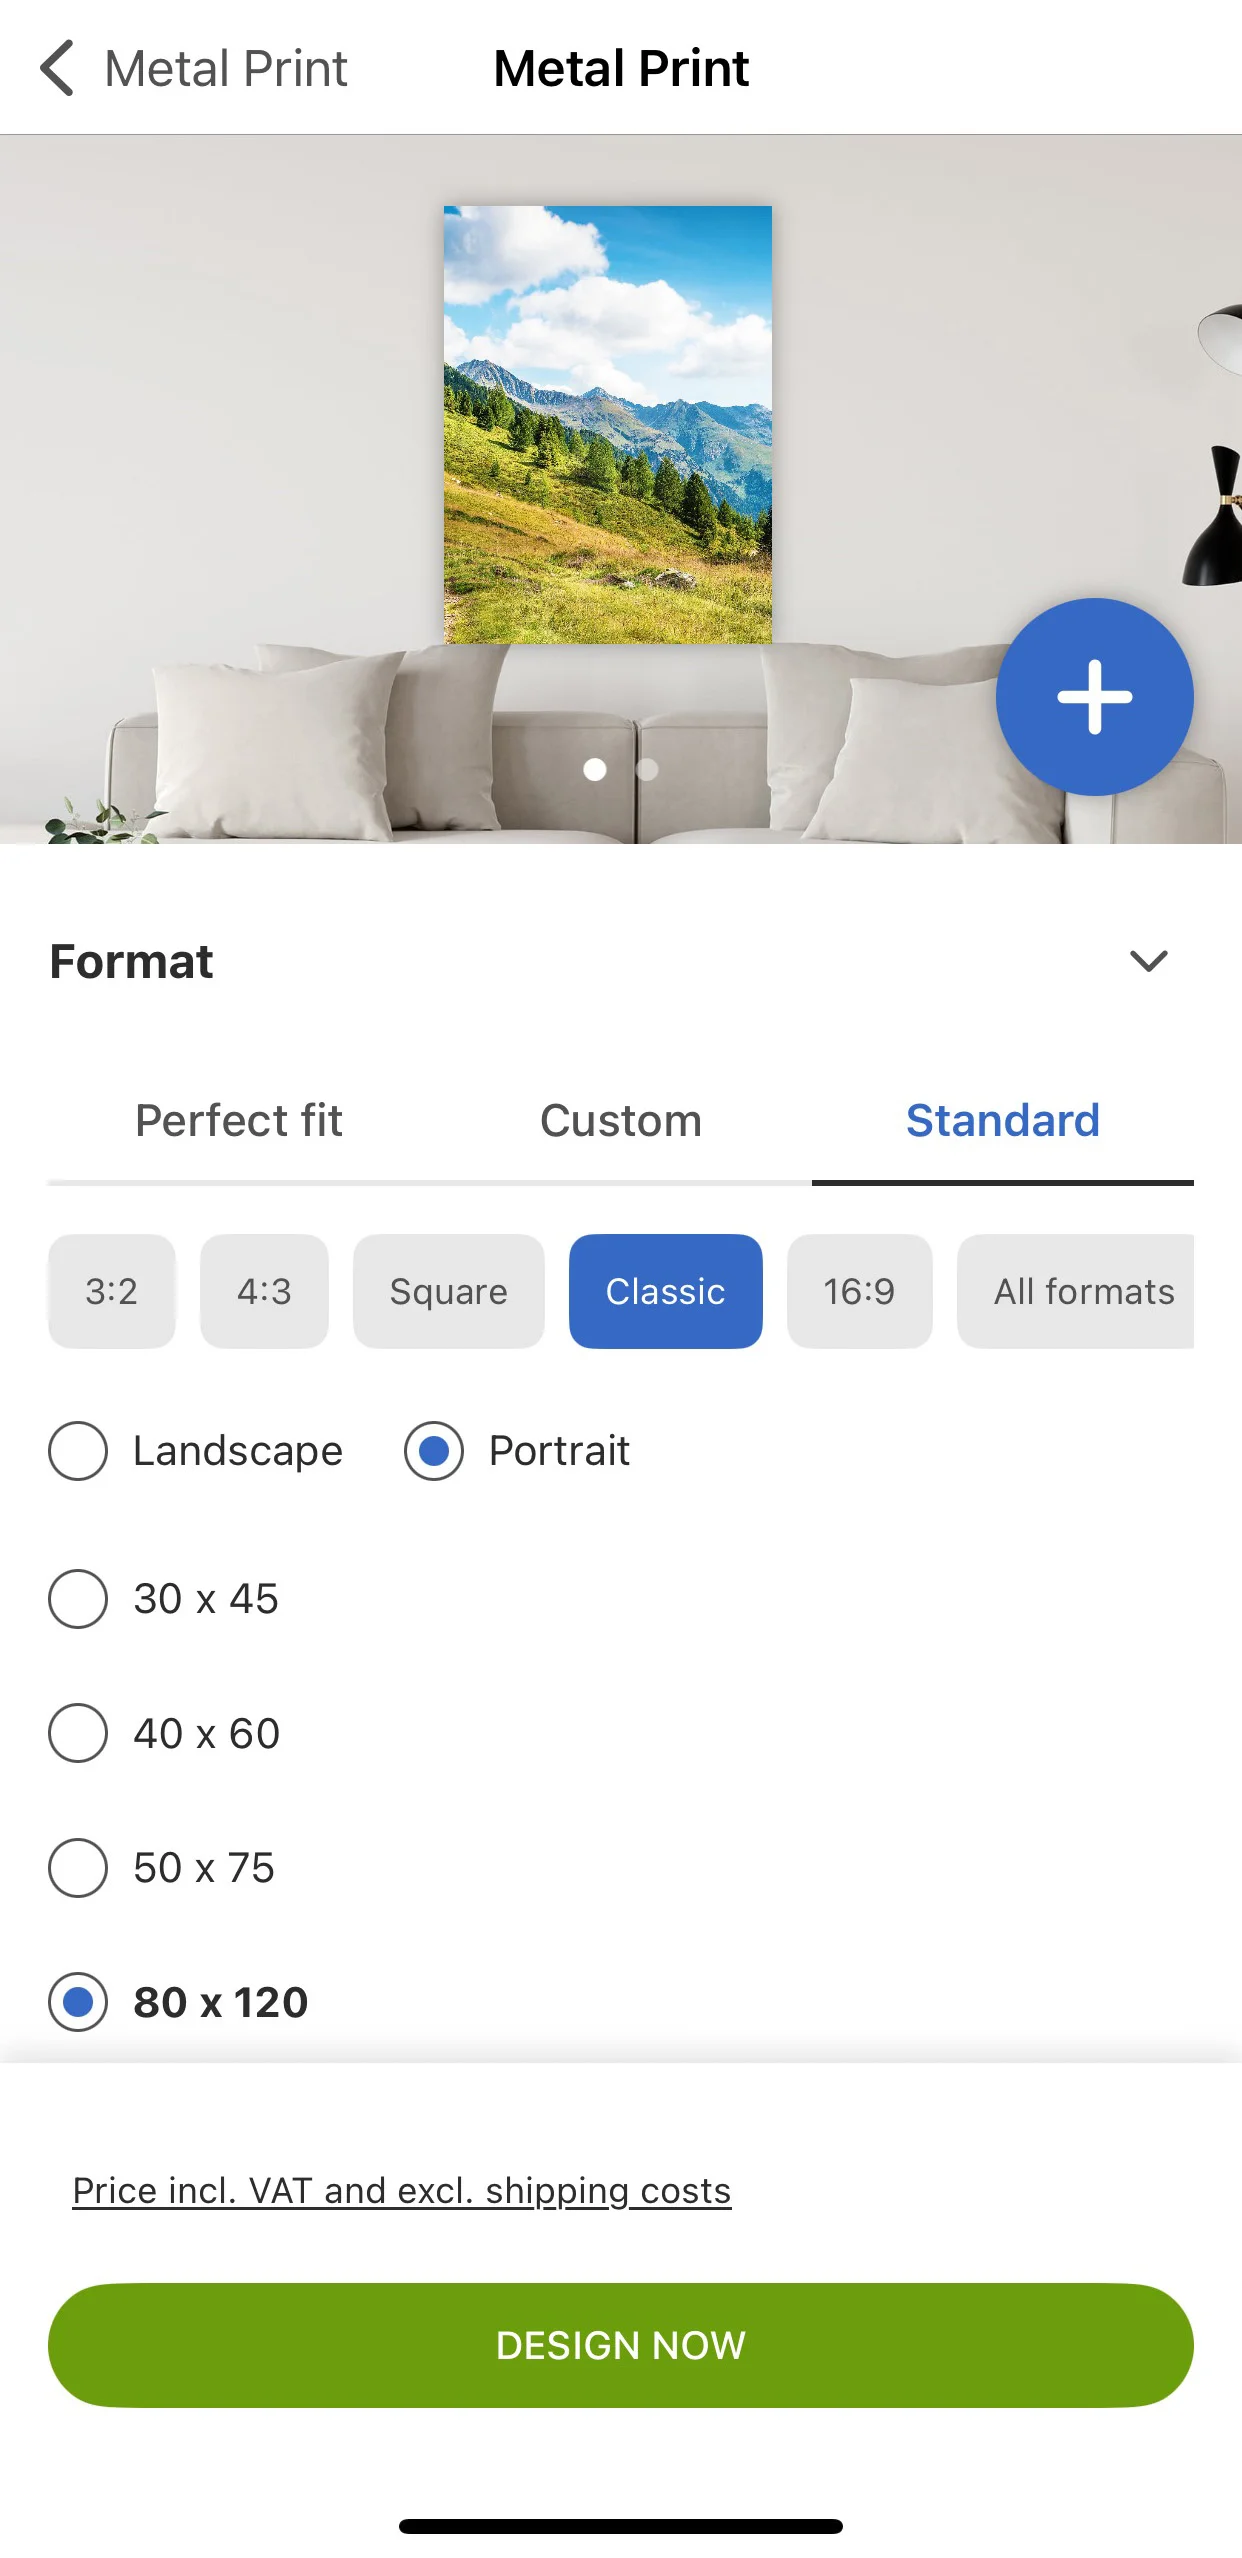
In the Wall Art section, you’ll find several options. Each Wall Art product has its own properties, so once selected, the configuration options will vary depending on the type of product. To help you configure your Wall Art, a mock-up will be displayed in the configurator after you select an option. By tapping the + button, you can upload your own image to the mock-up to get a better idea of the final result.
Wall Art Configuration
The available options will vary depending on the selected product. Generally, you will find:
Format
By default, the Standard tab is open. You can choose whether you want a Landscape or Portrait format by selecting the desired option. Additionally, you can choose one of the standard sizes for your Wall Art by tapping on it. These options can be filtered by selecting the aspect ratio at the top.

It is also possible to enter your own custom dimensions by selecting the Custom tab. This will bring up two boxes where you can enter the custom width and length for your Wall Art.
Selecting the Perfect fit tab will display an Upload own image button. By uploading your image with this option, the app will automatically identify the format and provide options for your Wall Art that fit your image perfectly, preventing cropping of your motif.
Print Mode
Choose between HD, which offers ultimate detail, sharpness, and gradient quality, or Default, which provides vibrant colors and high-quality production.
Mounting/Frame
Depending on the Wall Art option you select, you may be able to choose different mounting options according to your preferences. For more information on each option and installation instructions, please visit the Accessories section. Note that additional accessories can be ordered as needed by selecting Accessories within the Wall Art product selection. If you do not want to select a mounting, choose without mounting.
Design
Allows you to choose a predefined template for displaying multiple images. Note that the design can be completely changed later in the designer.
Photo Canvas
For Photo Canvas products, the printed fabric is carefully stretched over a solid real-wood wedge frame and fixed at the back. Due to this construction, additional configuration options are available:
Frame thickness: Select one of the available frame thicknesses.
Edge mirroring: When selected, the motif will be mirrored on all four sides of the frame. This prevents loss of important image parts by ensuring that only the mirrored section of the image is folded around the frame. If not selected, the outer parts of the image will be folded around the frame. Note that this option is only suitable for motifs with sufficient image material around the edges.
Wall Art on Designer
Once the Wall Art has been configured, tap on Design now. This will open the configured Wall Art in the designer, allowing you to customize it as desired.
To add an image, tap the image icon on the Wall Art. This will open the Upload Images menu, where you can select your desired images. For more information, read the Image article.
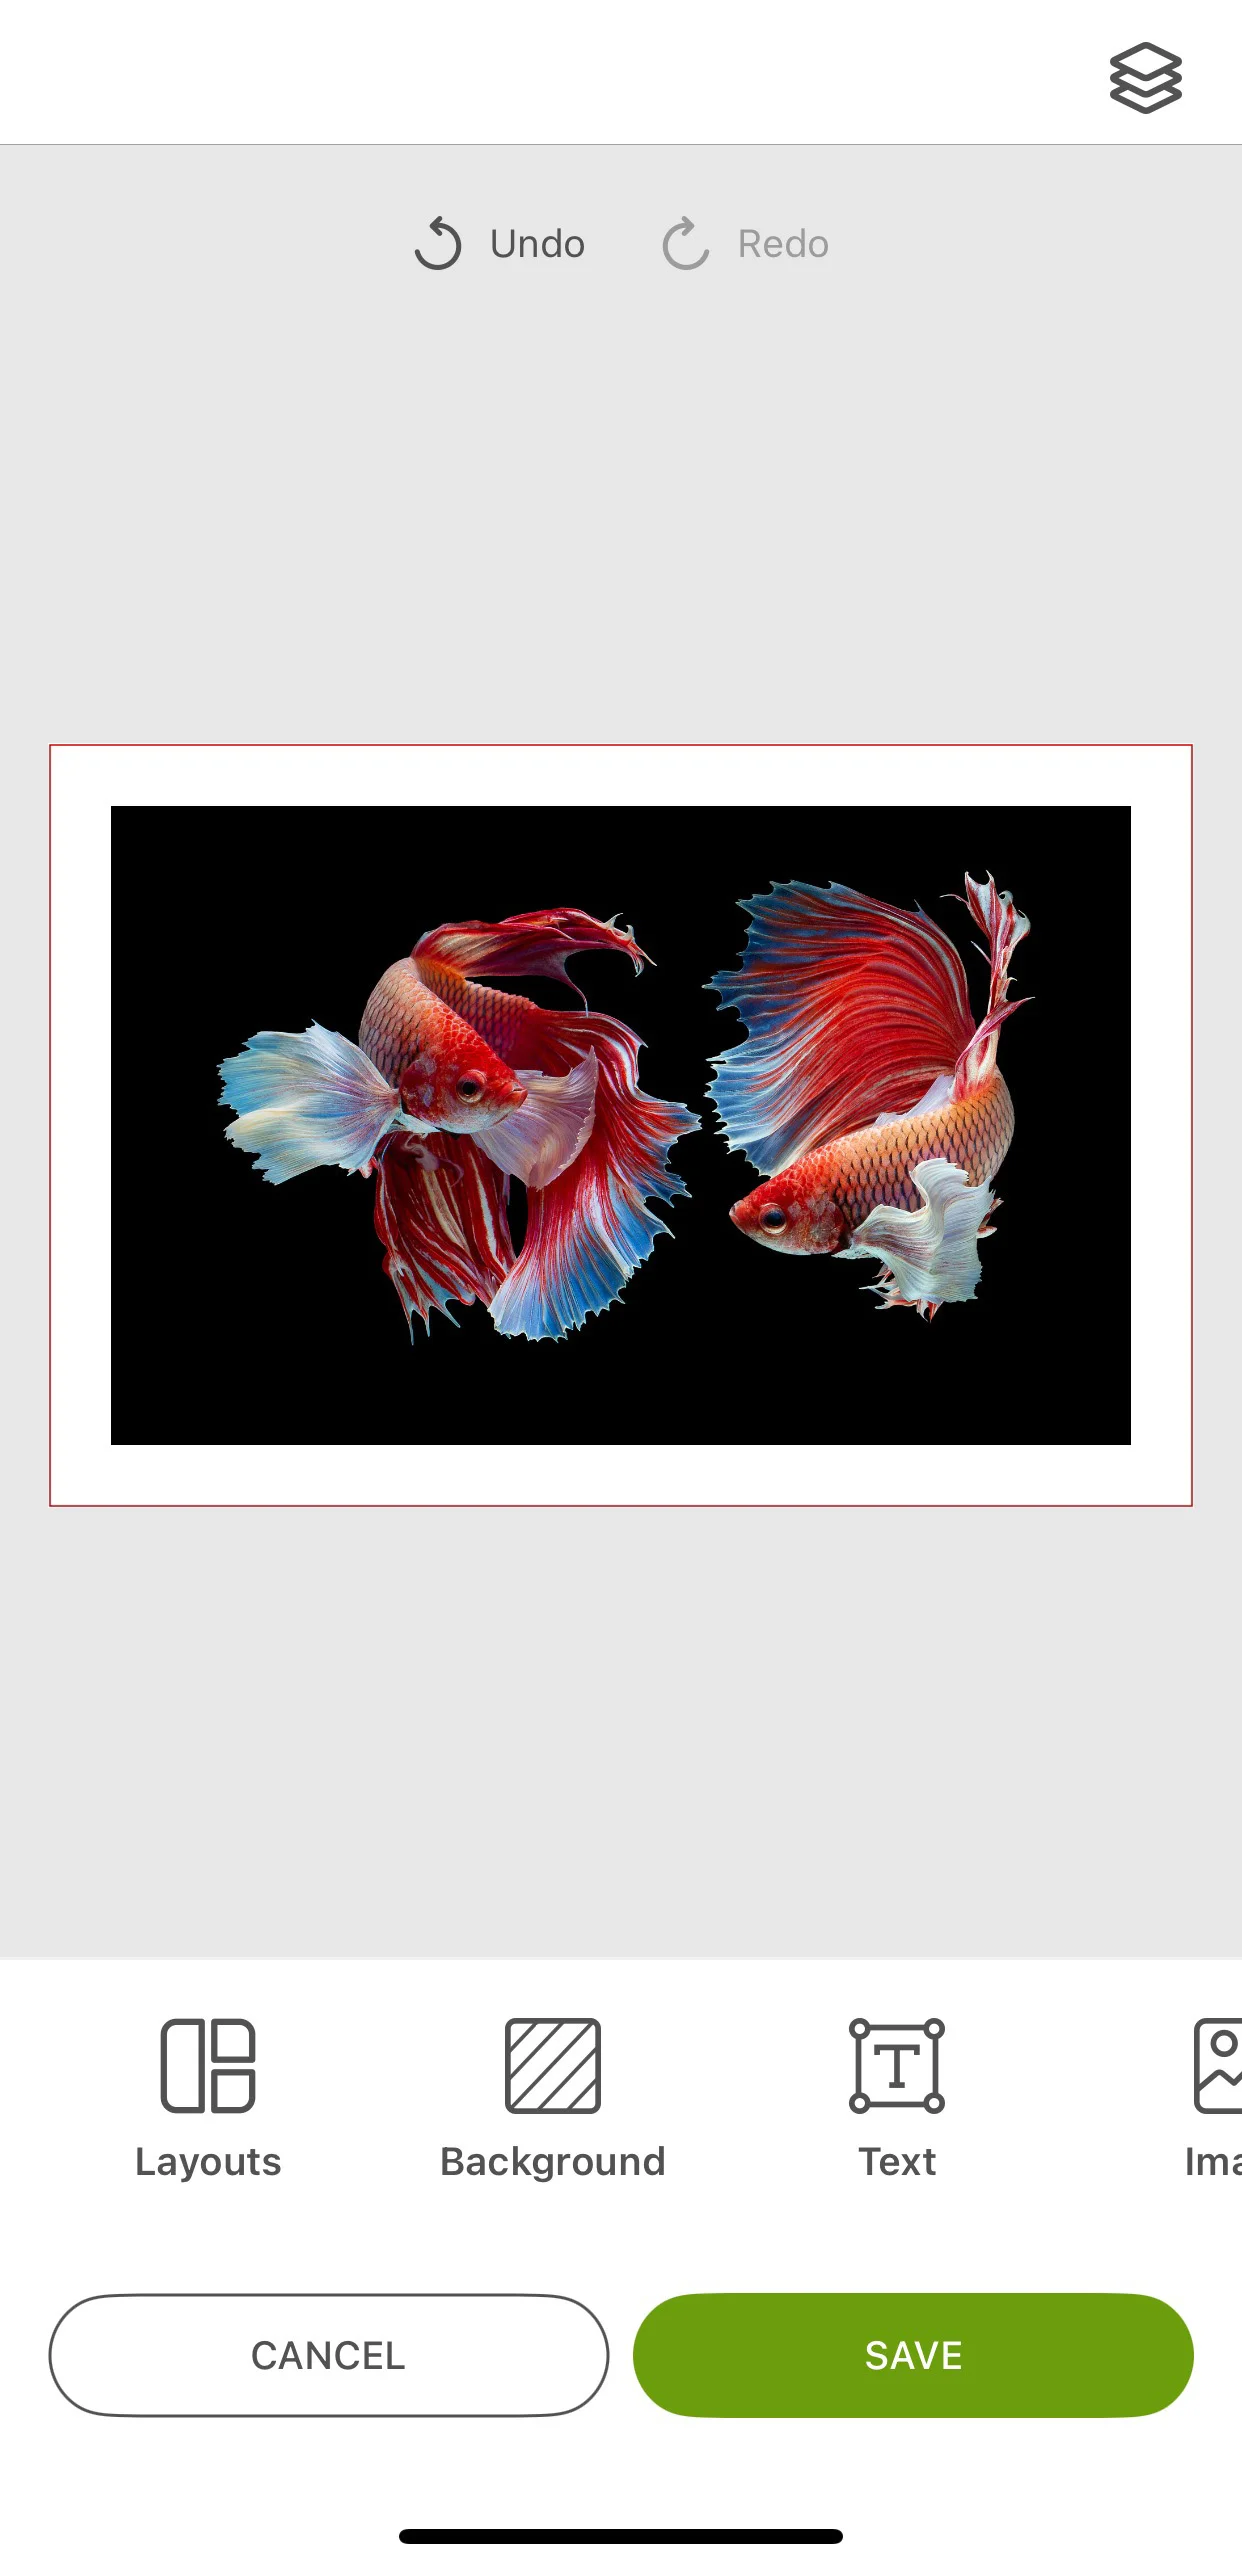
To access all design tools, tap the Edit design button. This will reveal all available edit tools at the bottom. You can select a Layout, add a Background, Text, Fill boxes, Cliparts, and QR codes. Once you are satisfied with your design, tap Save to save the changes and return to the Wall Art Designer.

To save the Wall Art to the project menu, select the three-dots button in the top right corner and tap the Save button. To order it, tap on Add to cart.


